This store requires javascript to be enabled for some features to work correctly.


How to Install YoLink Garage Door Controller 1
Looking for a smart garage opener/controller? Visit our Smart Garage page. If you already have a YoLink Garage Controller 1, here are instructions on how to install your YoLink Garage Controller 1
Make sure you’ve added the Garage Door Controller to the YoLink App before installation.
The Controller is difficult to relocate after being affixed to the mounting surface, so it's recommended to test your location before affixing the device. Use masking or painters tape to secure it on the surface and once you have it temporarily mounted, test it out. With the app in hand, open or close the door using the app. Optionally, you can set up your automation (e.g. turn on a light when the door is opened) to functionally test the status change of the door.
Get Ready to Install the Garage Door Controller
Before starting, choose the appropriate method for your installation.
Method A: Connecting to your garage door operator (typically on the ceiling of your garage)
Method B: Connecting your garage door operator to the button (typically on the wall).
For connections to the operator (Method A) you may install the Garage Door Controller on the garage door operator itself, near it on the ceiling, or on the wall, but please note the wiring requirements: the Garage Door Controller requires the included power adapter, which requires a 120V receptacle, which may or may not be available at your desired location. Also, power wiring will be required between the Controller and the power adapter and signal wiring will be required between the Controller and the operator.
Slotted screwdriver - Number 3 may be required

Begin Installation
Loosen the screw terminal using a 3 mm slotted screwdriver, connect the first wire to the associated screw terminal on the Garage Door Controller; do the same for the remaining three wires.
- Before connecting the wire to the terminal, ensure there is about 2/5 inch of bare wire visible (strip off insulation as needed)
- Insert the wire into the terminal, then tighten the screw terminal
- Gently tug on the wire to ensure a tight connection

Method A: Connecting to the Garage Door Operator
Remove the existing wires from the door operator, after making a note (or taking a picture) of their locations. Twist* together one existing wire to one (new) signal wire, install under the existing wire's original terminal. Repeat for the other existing wire and new control wire
*If the wires are not twisted together, it's important to ensure both the old and new wires are both secured in place under the terminal, making a good electrical connection

Test your garage door operator as you would normally use it. If it is not working properly, double-check or re-do steps 3 through 6 as needed. Need more help? Check the full manual for our Garage Door Controller 1.
Method B: Connecting to the Garage Door Control Button
Remove the existing garage door control button. Remove the existing wires, after making a note (or taking a picture) of their locations. Twist* together one existing wire to one (new) signal wire, install under the existing wire's original terminal. Repeat for the other existing wire and new control wire
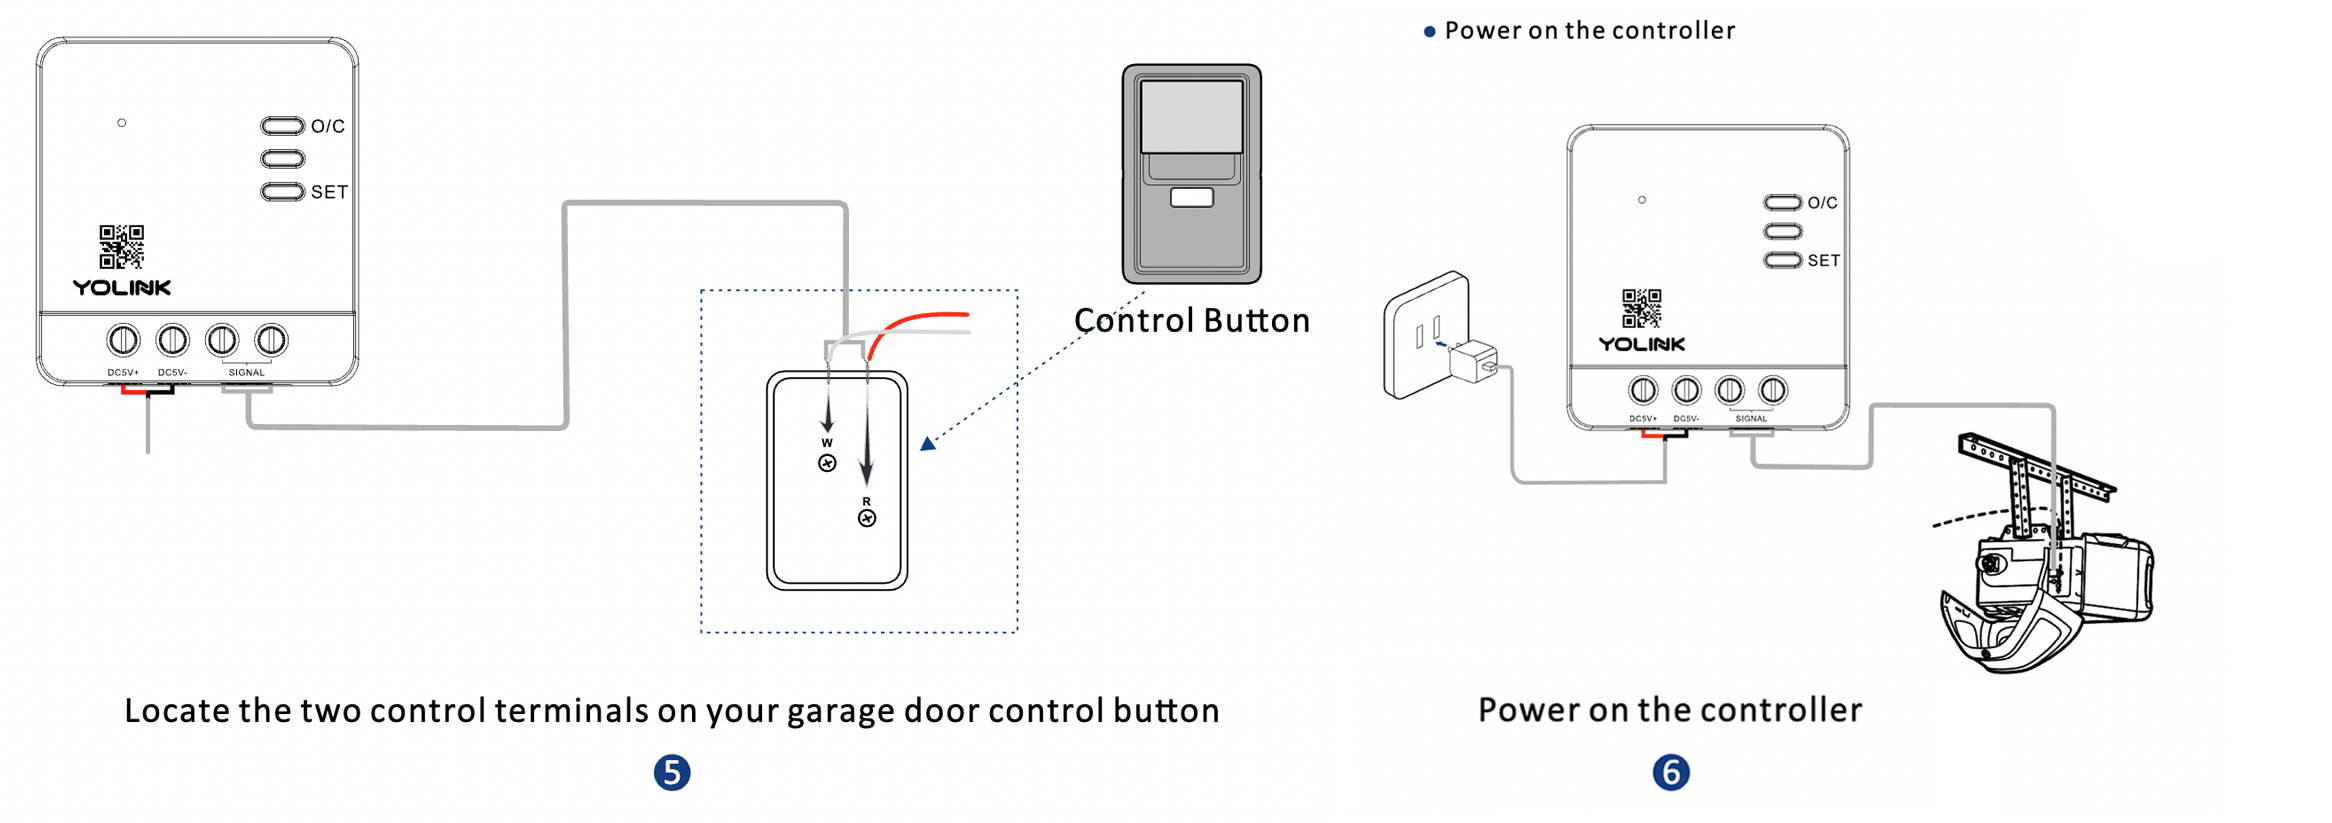
Test your garage door operator as you would normally use it. If it is not working properly, double-check or re-do steps 3 through 6 as needed. Need more help? Check the full manual for our Garage Door Controller 1.